Sunday, February 28, 2010

Heart & Crown Baby Cards Part 2

As promised, here is the step-by-step directions for the blue congratulations card. I'll keep these directions brief as this card is very similar to the pink one. :-)


Cut a 4" x 5 1/2" piece of basic blue cardstock, again from Archiver's.


Stamp using Broken China Distress Ink.


Add Broken China Distress Ink all over the cardstock but heavier around the edges.


Ink with Faded Jeans Distress Ink and on the very edges with Walnut Stain Distress Ink.


Distress the edges with Tonic Paper Distresser.


Stamp My Sentiments Exactly sentiment using Walnut Stain Distress Ink.


Cut out crown using the Silhouette Digital Cutter. Ink with Broken China, Faded Jeans and Walnut Stain Distress Inks. Stamp with part of a flourish from Parisian Market set using Broken China.


Ink smaller heart with Antique Linen Distress Ink.


Then add Tea Dye Distress Ink.


Ink larger heart with Walnut Stain.


Stamp flourish with Antique Linen. Adhere to larger heart.


Add blue gems from K & Co to the crown and then adhere to the hearts.


Add brown ribbon and pearl gems to blue cardstock, adhere to Chocolate Chip cardstock and then added the hearts using foam dots.


Thank you for stopping by!


Heart & Crown Baby Cards Part 1

Just watching a little USA vs. Canada Hockey today and I thought that I would post these cards for you. I made the pink one first without thinking of it as a baby card but it just spoke to me and so I made a blue one too.

I'll start with the step-by-step for the pink card first. Look to part two for the details of the blue card.


I started with a pink piece (4" x 5 1/4") of cardstock from Archiver's. I do usually prefer heavier cardstock, but I always have to use my free cardstock coupons.

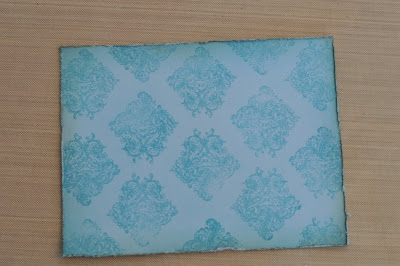
Using Worn Lipstick Distress Ink I stamped the flourish image from Technique Tuesday's Parisian Market set.

Next, I applied Tattered Rose Distress Ink all over the cardstock also focusing a heavier application around the edges.

I then went over the edges with Worn Lipstick Distress Ink using my Ink Blending Tool.

Next, I added Brushed Corduroy around the very edges.

I then distressed the edges using the Tonic Paper Distresser.


I then added a piece of brown organza ribbon from Creative Impressions and then mounted my pink piece to a piece of Chocolate Chip cardstock (4 1/4" x 5 1/2")

I then cut out two crowns using my Quickutz Squeeze and crown die. I actually just glued them together so I only colored the top one.

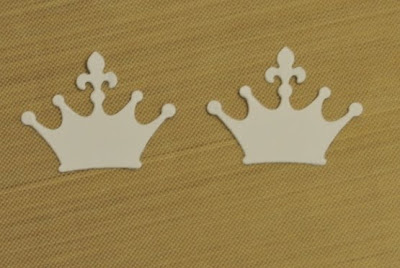
I used Tattered Rose, Worn Lipstick and Brushed Corduroy Distress Inks. Below you will see the shaded image. I also stamped the shaded crown with a flourish from the Parisian Market set in Worn Lipstick and added brown gems and Distress Stickles in Worn Lipstick and Rock Candy. (You can see these embellishments in the final image)

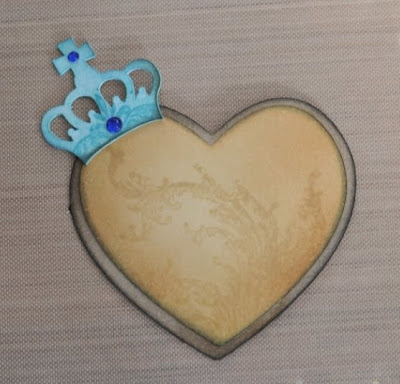
I cut out the heart using my Silhouette in white cardstock. I then applied Antique Linen Distress Ink to the heart.


I then added Tattered Rose Distress Ink.


I then added Brushed Corduroy on the edge.


I then stamped the large flourish from the Parisian Market set using Tattered Rose Distress Ink. I lightly spritzed the whole heart with water using my Mini Mister to slightly soften in the flourish.


I cut another heart slightly larger then my first heart I then applied Brushed Corduroy Distress Ink to the heart.


I then added Walnut Stain to the very edge.


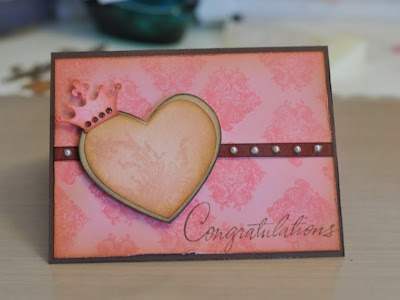
I assembled my pieces and added the gems and pearls to the card. It was at this point I decided to make it a congratulations card.


The sentiment is from My Sentiments Exactly.


Here is a close-up of the crown.

I'll be posting the step-by-step for a blue version too.

Saturday, February 27, 2010

With Sympathy Card

Good Evening! I sometimes have trouble coming up with ideas for sympathy cards. I recently needed to create one for some friends that had to put down their beloved dog. So here is my card that I made for them. I was, again, inspired by Jennifer McGuire. You could easily make this into any type of card by changing the sentiment.


I started by cutting out the smaller label with my Spellbinders Nestability Die from the Labels One set.


I then stamped the Antique Flower Background from Hero Arts in Broken China Distress Ink.


Then, using my blending tool I applied Broken China Distress Ink all over the die cut.


Next, I cut another Label from the same set in a larger size.

I edged the label with Antique Linen Distress Ink.


Next, I stamped the butterfly from the Hero Arts set Antique Engravings with Archival Ink in Pitch Black. I then colored the butterfly with Prisma colored pencils and then cut it out.


I then used a pop dot to mount it to the labels.


I then cut a piece of Sage Shadow cardstock and used an EK Success punch to embellish the corners. I also went over the very edge with Dusty Concord.

I then stamped the sage cardstock with the Stampin' Up background stamp Soft Swirls using Versamark Ink.


Then using the Wide Oval punch from Stampin' Up! I cut out a small label from white cardstock. I then applied Antique Linen Distress Ink over the shape. Then I applied Dusty Concord Distress Ink on the edges of the label. My last step was to stamp the sentiment from Stampin' Up!


The I assembled everything. Added two gold brads for an accent.
Lastly, I put all of this onto a piece of purple cardstock and then mounted it all to a white cardstock base.
I am hoping to have a few more cards for you tomorrow. :-)


Monday, February 22, 2010

Cards for 2.22.10

Hello -

It is another chilly day here in Colorado. We had snow for the third Sunday in a row and today it is only 22 degrees here today. Now the snow has stopped and the sun is out but it is super chilly.

So, my first card today was inspired by French Chablis. If you haven't seen what she creates head on over to SCS and check out her lovely cards.

I started with my trusty Tim Holtz Distress Inks in Faded Jean, Peeled Paint, Broken China and Tea Dye inks. I rubbed these on to my craft sheet and lightly spritzed with my Mini Mister. I once thought that I could use any mister but I have come to see the error of my ways. The Mini Mister gives a very light fine spray unlike anything else I have used, I never have water blobs.


Next, I pressed my Medallion Stamp from Stampin' Up into the ink pools. I did dip it a few times to be sure that I covered my whole stamp. I pressed my stamp onto a white piece of cardstock. I let it sit on the cardstock for awhile just to be sure that it had time to soak into the cardstock.


I mounted this to a piece of Barely Banana cardstock (SU!)and punched a slot on the left-hand side of my card and tied a small piece of Certainly Celery grosgrain ribbon (SU!)


Next, I stamped the sentiment with Broken China.


Next, for bling. The gems are from Hero Arts and My Little Yellow Bicycle.


Next, I broke out the liquorice . . . .

. . . . actually this is how I store my gel pens. :-)


I then used assorted gel pens to accent the design.


Here it is my finished card.


A bonus for today.


I made more flowers with my Silhouette. They all started as plain white cardstock. The larger flowers I colored with my Copic markers and the smaller flowers were lightly colored with Worn Lipstick Distress Ink. I cut the label with my Epic 6 and Spellbinders dies. The flourishes and border are from Papertrey Ink and the sentiment is from Stampin' Up. The gems are from Hero Arts and the ribbon is SU! Once I had assembled everything I spritzed the whole thing with Glimmer Mist in Pearl. I got a little heavy with the spray but I still like it.


A close up.

Thank you for stopping by and have a wonderful week.