Wednesday, December 08, 2010

Where does the time go?

Hello!

I am sorry I just fell off the planet there for a little while. It has been a little crazy around here with the Holidays and general baby stuff. On top of the general craziness that seems to be my life my Hubby has been traveling a ton and working lots of long days. Having said that, I have been making a few cards and doing my other crafts. I think that I might have a craft addicition as I am currently working on at least five non-stamping projects including my first quilt.

In my last post I mentioned some projects that I wasn't able to share. Well, here they are. I had applied for a contest with Tattered Angels and since I didn't make it in, I can share these with you now. They are, naturally, Tattered Angels product heavy. :-)


On this first card I sprayed the background with Gold Glimmer Mist and let that dry. I then cut out the chandelier from QuicKutz with my Epic 6 in plain ol' cardstock. I placed that cardstock over my gold colored cardstock and spritzed with Graphite Glimmer Mist. I dried this with my heat gun and added a little Black Soot Distress Ink around the edges. The sentiment is from Fancy Pants and the frame is from Tattered Angels' Glimmer Chips Regal. To color the frame I first sprayed the whole frame with Gold Glimmer Mist and then added Viva Pink on the lower edge while the gold was still wet. The hanging "crystals" are die cuts from QuickKutz cut out of white cardstock and colored the same way as the frame. The pink ribbon is from Stampin' Up and the gems are from Hero Arts. The pink cardstock is also Stampin' Up.


I love this photo. My brother took this of our daughter asleep on my shoulder. For this project I started with a stretched canvas which I painted with Adirondack acrylic paints first in Pitch Black and once that was dry with Snow Cap and Red Pepper mixed to make pink. I don't currently have any pink so I improvised. :-) Once that dried, I distressed the edges with a saning block so the black paint would peak through. I then added a healthy amount of fine glitter. After allowing the glue to dry I sprayed the glitter with Viva Pink Glimmer Mist. I mounted my photo to a piece of cardstock that I had colored with Glimmer Mist in Black Cherry and the Fanciful Stencils Glimmer Screens. The corner pieces and the lock are Glimmer Chips from the Regal set and colored with Viva Pink Glimmer Mist and Glimmer Glam in Lipstick Pink. Although the Glimmer Chips are self adhesive I glued them down just to be sure they would stay. I then added the flowers from Prima with gem brads from My Mind's Eye. I cut out the sentiment using my Silhouette Digital Cutter. You can't really see the last step in the photo, but I added a pink ribbon around the edge of the canvas.


I love the way this card turned out. I made the background with Patina Glimmer Mist and Pealed Paint Distress Re-Inker and Gold Perfect Pearls mixture along with the Fleur-De-Lis Glimmer Screen from the Fanciful Screens Set. I then used the new Chalkboard Glimmer Mist in Cornflower on the heart diecut. The heart is out of white cardstock and was cut-out using my Silhouette Digital Die Cutter. I hadn't ever used this product before but I really liked it. Once that was dry I added the ribbon and the Glimmer Chips. Both of the Glimmer Chips were from the Regal set. The Fleur-De-Lis was colored using Silver Sugar and Patina Glimmer Mist and crown was colored with Gold Glimmer Mist. The gems are from My Little Yellow Bicycle.

I have two more projects but I think that I'll save those for another day. Thanks for stopping by!

Tuesday, October 19, 2010

Rusted Enamel Card

Hello All -

Sorry I have been MIA recently. I was working on a project that I cannot share just yet and then my horse decided to get a fairly serious injury. He is going to be okay, but it has been a lot of doctoring recently.

Today's card was created using Tim Holtz's rusted enamel technique and all of the shapes were cut using my Silhouette. Silhouette has recently upgraded the software that runs the machine. There has been a little learning curve but so far I am really liking the program. It seems a little more sophisticated and gives the user more control. I know I have said it before but I really love this machine!


My first step was to cut out two of the nested shapes (Artisans Nesting Rectangle) out of white cardstock. I inked the larger with Vintage Photo Distress Ink using my handy dandy ink blending tool.On the smaller shape I did the enamel technique using Weathered Wood and Vintage Photo Distress Ink and clear embossing powder. I then cut out two circles adding Vintage Photo Distress Ink to the larger and repeating the rusted enamel on the smaller circle. I didn't flick off as much embossing powder this time and so the circle is a little more shinny. I then took my medallion shape (Medallion Flourish) and inked on Vintage Photo. I felt like it didn't "pop" enough for me so I spritzed it with my mini mister filled with Vintage Photo re-Inker and Perfect Pearls in Copper. Just the right about of sparkle. I cut four of the large flowers and six small (3 Flowers), I removed the cut-outs out of on the small flowers. I added Antique Linen to the flowers and then shaped them into the flower shape and added My Minds Eye Lush brads. These brads rock!

For my finishing elements I added two brown organza ribbons, the smaller is from Creative Impressions and the larger ribbon was recycled from a present. I added two bronze brads to hold the ribbon in place. I assembled everything and voila! You can see a detailed photo below.


Here is a photo of the whole card without the flash.


As always, thank you so much for stopping by!

Wednesday, September 15, 2010

We're Back!!

Hello Bloggerland -

We have returned from our short vacation to Southern Colorado to visit my husband's family. We had a wonderful time and I have been working hard to get back into the swing of things. Here are a few cards for you today.


To start we have a thank you card, I know that I make a lot of thank you cards but I always needing more.

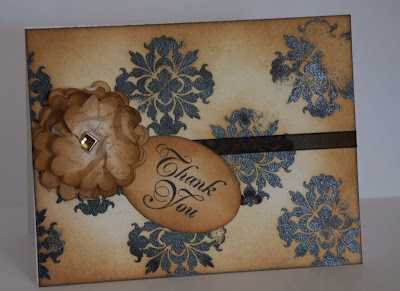
I first stamped the damask design from Heidi Swapp in Bundled Sage Distress Ink on a white piece of cardstock and then using Vintage Photos I lightly stamped french text over the card base, the stamp is Stampin' Up's En Francais. Next, using my ink blending tools I applied Bundled Sage, Mustard Seed and Wild Honey. I cut the label using the Spellbinders Label Two set. I left the die on the label and sponged it with Tea Dye Distress Ink. Next I stamped the sentiment from Waltzing Mouse Stamps Victorian Frippery in Bundled Sage. I added the two ribbons and fiber to the card mounted on a piece of Certainly Celery cardstock. I adhered the flowers from Prima, added the Hero Arts gems and attached the gem brad from My Minds Eye. Volia!


I have been watching a few YouTube videos on making flowers and here is my attempt at a layered flower. I cut out nine daisy shapes using my Silhouette machine. I made each flower about 1/4 inch smaller. I painted each flower with red watercolor paint. Once dry, I adhered the flowers together and spritzed them with Perfect Pearls in water. For the background I stamped the damask shapes from Papertry Ink's Damask Designs set using Pixie Dust chalk ink. I used a little Tea Dye Distress Ink around the edges and adhered the background to a piece of pink cardstock. I then added the peach ribbon. My last step was to add the small gem from Hero Arts.


My last card for today features the new Wanda's Pantry Stamp Set from Waltzing Mouse Stamps. I stamped the Love label image using Memento Ink. I colored it with an assortment of cool grey Copic markers (C5, C7, C9) and R27. I cut the black label using Spellbinders Label Four set. I stamped the background using an image from Papertrey's Giga Guidelines set, I used Going Grey from Stampin' Up. I then sponged over the background using Going Grey ink with a little Weathered Wood and black Soot on the edges. I then roughed up the edges and added it to a black piece of black cardstock. I added the grey organza ribbon and a little red ribbon. I love this set but just haven't had much time to use it yet.

That's it for today! Have a wonderful week.

Friday, August 20, 2010

Cards for August 20th

Hello All! I hope you had a wonderful week. I have a few cards for today. I bought a few new stamps from The Greeting Farm and I am having so much fun coloring them with my Copic markers.


My first card is for my cousin in-law who is a nurse. Just a little note to say "hi." A few years a go there was a cartoon called the Animanics and one of the characters always said "Hello Nurse." So, I thought that I'd use that sentiment on this card.

Materials
Stamp: Cheeky Nurse from The Greeting Farm
Ink: Jet Black Archival Ink by Ranger (embossed with Clear Embossing Power)
Cardstock: Real Red from Stampin' Up and Solar White from Neenah Paper
DP: Autumn Leaves
Dies: Moxie from QuicKutz & Oval Nestabilities from Spellbinders
Flowers: Prima
Gems: Hero Arts
Brads: My Mind's Eye Lush Collection & Creative Impressions
Glitter: Stickles in Xmas Red


Next we have Tuesday from the Creeper Crew by The Greeting Farm. I love her attitude! 

Materials 
Stamps: CC Tuesday by the Greeting Farm, Giga Guidelines from Papertrey Ink & My Sentiment's Exactly
Ink: Tuxedo Black Memento Ink, Victorian Velvet & Tumbled Glass Distress Ink from Ranger/Tim Holtz 
Markers: Assorted Copic Markers
Paper: Solar White from Neenah Paper & Light Blue paper from The Paper Co
Dies: Labels Two Nestabilities from Spellbinders
Ribbon & Brads: Creative Impressions
Heart Eyelet: Queen & Co
Glitter: Stickles in Yellow

And now for a bit of a gear change. :-)

This card features the Medallion stamp from Stampin' Up. I love this stamp I find that very versatile! I broke out the real glitter, versus Stickles for this card. As a result I am finding little pieces of glitter all over the house. I have actually picked a few pieces off the baby. I use the Art Institute Art Glitter Designer Adhesive when I work with glitter along with the Ultrafine Metal Tip. I feel like this gives me the most control over the glue and I feel like the adhesive really holds the glitter in place. I will say that I do clean the metal tip after each use by soaking it in soapy water and then making sure that all of the adhesive is out of it with a small pin. It can be a bit of a hassle but then I don't have to struggle with picking dried glue out of the tip later.

Materials
Stamp: Medallion from Stampin' Up
Paper: Neenah Paper, The Paper Co
Ink: Versamark Ink & Weathered Wood Distress Ink
Embossing Powder: Black from Stampin' Up
Marker: Copics
Glitter: Real Red from Stampin' Up
Adhesive: Art Institute Designer Adhesive
Tool: Ink Blending Tool


My last card for the day is something I made for another card maker and I hope that she enjoyed getting it. I really find myself reaching for my Distress Inks a lot, they just work great for this type of look.

A quick tip: When I use Distress Inks with clear stamps I usually load the stamp with Versamark Ink first. I find that this minimizes the ink beading that can sometimes happen with clear stamps.

Materials
Stamps: From the Garden by Fancy Pants & Giga Guidelines from Papertrey Ink
Ink:  Dried Marigold, Spiced Marmalade, Tattered Rose & Wild Honey Distress Inks & Versamark Ink
Paper: Solar White from Neenah Paper & Stampin' Up
Die: Labels Four from Spellbinders
Gems & Pearls: Hero Arts
Glitter: Stickles in Yellow & Orange


Have a wonderful weekend and happy crafting!!

Wednesday, July 28, 2010

Cheeky Rockabilly


I love the Cheeky Cherry stamps from The Greeting Farm! I thought that I would try a challenge from the Color Me Copic blog. The challenge was to color using black and white. I went with the warm tone grey copics. The circle stamp is Butterfly from Inkadinkado and was stamped using Pumice Stone Distress Inks. I then stamped the long image which is from Technique Tuesday and is called Bijou Borders, also stamped in Pumice Stone. I sponged the background and stamped the sentiment from Fancy Pants. The gems are from Basic Grey and are grey and clear. I really enjoyed this challenge!


Here is an easle card I made with th Cheeky Rockabilly again using my Copic markers. These are so much fun! The ribbon is from Creative Impressions and the flowers are from Prima. The gems are from Hero Arts and the glitter paper is from Archiver's.


Thanks for stopping by!

Thursday, July 22, 2010

Cards for July 22nd

Little Charlotte is taking a nap so I am really hoping to get this post done before she wakes up. The joys of crafting with a three month old. :-)

So my first card for today features the awesome Cheeky Rockabilly from The Greeting Farm. I colored her with my Copic markers added Hero Arts gems and layered her to two cardstock ovals, that I cut with my Spellbinders dies. I aged the DP with Tea Dye and Vintage Photo Distress Inks and mounted those pieces to Glorious Green CS from Stampin' Up. The edge punch is from EK Sucess. The sentiment is from Stampin' Up's Warmest Regards set. I think that she turned out pretty cute!


All of the images on this card are from the Fancy Pants Bella Brush set. I used Antique Linen, Dried Marigold, Spiced Marmalade and Vintage Photo Distress Inks. My card base started as a piece of white cardstock and I just kept adding ink and stamped images. The ribbon is from Creative Impressions, flowers are from Prima and the gems and pearls are from Hero Arts, the brads in the center of the flowers are from My Minds Eye.

Thank you for stopping by!

Thursday, July 08, 2010

Cards for July 8th

I hope that everyone had a wonderful 4th of July. We loaded up the baby and dogs and headed to my parent's house. There is a new development just south of their house and we can watch the fireworks from the deck. It is so nice. The horses are not huge fans but they seem to stay pretty calm but do go in and out of the barn a lot to keep an eye on things. We slept with the windows open and were awakened at 4 am not by the baby but by coyotes right outside the window. Okay they weren't right outside but they were close and they were loud. Luckily the barn cat was still there in the morning.

For my first card today I attempted something a little different. I wanted to make a shabby chic card versus my normal distress. I tried to explain what shabby chic is to my husband and I decided that it is like distress only with white as the main color. Not sure that really describes it but that was the best I could do.


I used my Silhouette Digital cutter to cut out the bird cage, the bird, the roses and the word "Dream." I used a font called Be Safe.

I started with the background by cutting a piece of white cardstock. Using Spun Sugar Distress Ink I stamped the background using Hero Arts Antique Flower stamp. I then used Antique Linen Distress Ink to stamp over the flowers with a stamp from Fancy Pants. I the went over the edges of the paper with Spun Sugar and Victorian Velvet Inks. I distressed the edge with my paper distresser. I then mounted that to a piece of pink paper that I also distressed the edge and inked lightly with Antique Linen Distress Ink.

Next, I went to work on my embellishments. I started with the birdcage. I cut it out of white cardstock and then inked it with Antique Linen Distress Ink and then added the pink and clear gems from Hero Arts. The bird was also cut using my Silhouette and then painted with Antique Linen crackle paint. It did curl up but I set a little weight (I use an old small glass bowl for a weight) on it when I glued it to my card. I layered on the pink ribbon which I received in a mystery box I ordered from My Sentiment's Exactly but I suspect that it is from Creative Impressions. I added my bird and birdcage. Next I painted the grungeboard key hole with pink and white paint from Ranger. I was actually a mix of red, white and pearl paints since I don't have pink. I painted it in several layers because I wasn't happy with the color. I adhered this to my card using off-white eyelets. I then adhered my "Dream" to the card and once that was dry I added Rock Candy Distress Stickles. (It's hard to see in the photo it is a very subtle bling).

My last step for the card was to create the tiny roses. I used a new release in the Silhouette Machine store called 3D Rose. I made these pretty small, the flat roses are about one inch in size and the completed roses are around one centimeter. I inked the pink and tan roses before rolling them, using Spun Sugar and Tea Dye Distress Inks. I rolled the other two roses and then applied ink on the edges only. These can be a little tricky to roll up but I found that gluing them at the half-way point and letting that dry before rolling the rest was helpful. You might want to cut them out of a lighter weight of paper.Once I glued those on we were set.


My second card today was also created with images purchased and cut with my Silhouette. It was a very simple card but I really like how it turned out. I started by cutting my images out with the Silhouette and then inked them with my Distress Inks and Ink Blending Tools. I used Wild Honey, Barn Door and Vintage Photo. I then adhered the Mendi images to my layered card and added Stickles. Easy Peasy!

Have a great week and thank you for stopping by. :-)

Saturday, June 19, 2010

Cards for June 19, 2010

I wish I was clever. I always want to have a cute and clever title for my posts but I can never seem to think of something that doesn't seem dorky. So, in that vein I have a boring title today. :-)


My first card today is a very summer inspired card. The plaid element was created using Ranger Alcohol Inks and the Alcohol Ink Applicator. To start I placed small puddles of each color on the applicator and applied the inks in a single direction on to the glossy white cardstock, the I reapplied the inks and brushed the applicator in the opposite direction. Once that was dry I used Archival Ink to stamp the dragonfly. The dragonfly is from the Tattered Angel's Field Notes stamp set. I then stamped the swirls from the same set using Adirondack Paint in Pearl. The little flowers are from Creative Impressions as are the brads.


This card is a variation of an earlier card, please see that card here http://badablingblog.blogspot.com/2010/05/mothers-day-card.html. On the background I stamped the damask images in the same manner as the earlier card but I used Victorian Velvet and Spun Sugar Distress Inks to color in the background. On the edges I added Dusty Concord and Black Soot. I added Gurngeboard hinges by Tim Holtz that I painted with Pewter Crackle Paint. The sentiment is from Papertrey Ink's Giga Guide Lines Set. I colored the center of the flourish using Tea Dye and Vintage Photo Distress Inks. The paper flowers are from Prima and the gems are from Hero Arts and Basic Grey. I don't know if you can tell from the photo but the large gems are grey.


My last card for today was made with Technique Tuesday's Parisian Market stamp set and an assortment of Distress Inks. I stamped the background images using Broken China on a white piece of cardstock and then I used my Ink Blending tool to add the ink over the images. I used Tumbled Glass, Old Paper, Wild Honey and Rusty Hinge Distress Inks. I stamped the large element with Embossing Ink and the embossed with Distress Embossing Powder in Walnut Stain. The oval is a piece of Grundeboard painted with Gold Paint from Adirondack by Ranger.The Fleur-de-Lys is a punch from EK Success. The ribbon is from Creative Impressions.

Thank you for stopping by today!


Monday, May 24, 2010

Odds and Ends

Hi All -
Last week I was very motivated to use up the bits and pieces I had around my craft area. I had made some backgrounds and accent pieces and I finally put a few together to make some cards. Because some parts of these cards have been around for awhile it might be a challenge for me to remember all of the techniques or colors I used but I thought I'd share anyway.
For this purple card I applied ink to a piece of white cardstock using sponges (I am pretty sure they were Distress Inks). Once I was happy with the background I let it dry thoroughly. I then stamped over the ink with Versamark ink, the stamp is Regal from Tattered Angels. I then embossed with clear embossing powder. Once that cooled I mixed Twilight Purple and Espresso Adirondack paint on my craft sheet, I made sure that the two colors weren't completely mixed and I then applied the paint over my background with a makeup sponge. I gave that just a minute to dry and then took a damp paper towel and rubbed the paint off of the embossed swirls. I live in Colorado and things dry fast here.
The damask image was cut from white cardstock using my Silhouette. I then painted the image with Silver Adirondack paint and let it dry. My final step was to assemble everything.
For the background of this card, I again applied Distress Inks to a piece of white cardstock. I had cut out the "Rock Star" with my Silhouette for another project and used the negative as a stencil and colored in with Distress Inks. I then stamped a variety of images with more Distress Inks. The wings are from Regal Flourish Set by Tim Holtz for Stampers Anonymous. The heart was cut using my Silhouette. To color the heart I spritzed Fired Brick reinker and water on my craft sheet then rubbed my heart in the pool of color. I then repeated the process with Gold Glimmer Mist.
For this card I used a few techniques that I have described before here on my blog so I'll just list the products. Stamps: La Letter - Hero Arts, Giga Guide Lines - Papertrey Ink, Thank You - Inkadinkado, Inks - Assorted Distress Inks, Noir Palette Ink. Flower: Silhouette. Gem - My Minds Eye, Organza Ribbon - Creative Impressions. Below is a close-up of the flower.
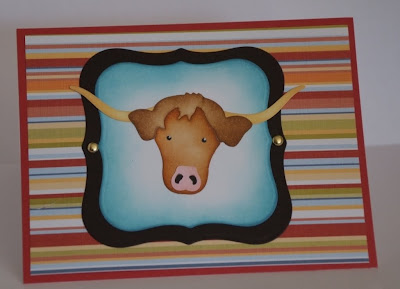
The last card was something a little whimsical. The highland Cow is from the QuicKutz Scotland set. I cut him out of white cardstock and then colored him with Distress Inks and my Ink Blending Tool. The frame is from Spellbinders and the paper was just some random paper I picked up at the store.

I know a little disjointed and maybe a little odd, but I was trying to get this posted while a little someone was napping. Have a great week!


Friday, May 21, 2010

Dreaming in the Garden

The other day I was cutting out some Russian nesting dolls with my Silhouette and had a little extra room on the last piece so I threw in a small piece of fencing. Honestly I didn't even really measure it. I just thought that I might use it on a card, and here is that card.


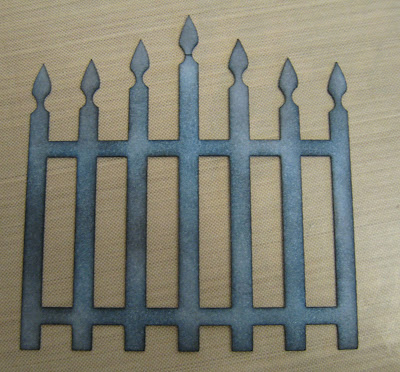
I started with the fence. I cut it out of white cardstock using my Silhouette.

Next, I added Weathered Wood Distress Ink.
Then Black Soot Distress Ink.
To give the gate a more wrote iron look I added Stormy Sky Distress Ink.
Then I started with a quarter sheet of white cardstock.

I then rubbed Crushed Olive, Bundled Sage, and Forest Moss Distress Inks on my Ranger Craft Sheet and spritzed with water. I then took my cardstock and dragged it through the color until I was happy with the result.
All stamps on this card are from Tim Holtz Flights of Fancy clear stamp set by Stampers Anonymous. I stamped the flowers with Forest Moss Distress Ink.
I added the flowers on the left, stamping them with Bundled Sage Distress Ink.
The dream sentiment was added with Forest Moss Distress Ink.
And now I started my favorite direct-to-paper inking. Here I started with Bundled Sage Distress Ink, then Forest Moss Distress Ink and on the very edges I added Pine Needle Distress Ink.

I mounted the background to a piece of Basic Black cardstock and then to a piece of Forest Foliage cardstock, both are from Stampin' Up!
I added my gate to the background and added a few flowers that I had left over from my previous card. I added a few gems by Hero Arts, because all cards need bling and voila - all done.
I am sorry that my photos are a little blurry, I had the wrong lens on my camera and didn't bother to change it.
Thank you for visiting and have a great weekend!


Thursday, May 13, 2010

Mother's Day Card

Hello All - I know that it has been awhile but the new baby has been keeping us very busy. I did manage to sneak in a card over the course of a few days, working a few minutes at a time. I made this card for my mom for Mother's Day.

I started by cutting out the frame and flowers using my Silhouette Machine. Both elements were purchased from Silhouette. I added text to the center of the frame prior to cutting it out. The text says "Mothers hold their children's hands for a short while, but their hearts forever." Once cut out I inked the center oval with Antique Linen and Frayed Burlap Distress Inks. I then inked the frame with Weathered Wood and Black Soot Distress Inks. My next step was to color the flowers, for these I used Milled Lavender and Dusty Concord. To give the flowers a little shape I pressed each petal around a small dowel (aka cuticle stick).

For the background, I stamped the damask image from Great Impressions in Dusty Concord and then embossed with clear embossing powder. I am loving this stamp and I am sure you will see more of it. I then applied Milled Lavender over all of the background, then Dusty Concord keeping mostly to the edges. To give added depth to the colors I added Weather Wood and Black Soot Distress Inks around the edges. Once that had a chance to dry I used my Distressing Tool to rough up the edges, added a black organza ribbon from Creative Impressions and adhered the background to a black piece of cardstock. I assembled the card and added gems from My Little Yellow Bicycle and Hero Arts.

A pretty simple but high impact card. I hope you all have a wonderful day!

Wednesday, April 21, 2010

A few cards

Hi All -

I know that I have been MIA for a little while. We are still waiting for the baby to arrive and as we get closer it is harder for me to get these cards created and posted. I do have a few quick cards to share today.


For the crane card I started with a light blue piece of cardstock for the base. I then cut out the crane from the QuicKutz Japan set. I actually cut him out of white cardstock and colored in the various parts with Copic markers. I then glued him together and set him aside to dry. I then cut out the temple out of black cardstock. The Chinese characters stamp is from Inkadinkado and I stamped it with Embossing Ink from Ranger and then embossed with Gold Zing! EP from American Crafts. I then mounted the red cardstock to Brushed Gold cardstock from Stampin' Up! I added a gold brad and assembled the card. My last step was to add the Hand Stamped from Stampin' Up! with Tumbled Glass Distress Ink from Ranger.


I made 20 of these carrots for my Baby Shower. I cut out the carrot box from Silhouette. The bunny is also an image from Silhouette and added that to the carrot so there would be a bunny shaped hole when I cut the box. Once cut, I glued a piece of cardstock behind the bunny and then I added the green glitter. I made half of these with green bunnies and half with pink bunnies. I then glued my boxes together and filled them with candy and tied on the green ribbon.


This last card was made for our vet that did our French Bulldog's spay. The staff and vet were great and really made us feel at ease. I broke out my Silhouette cutter for this one, I added the oval to my software and added the paw print in the center. This is similar to the bunny boxes in that are cutting a shape within a shape. I added color to the oval using assorted Tim Holtz Distress Inks. The stamps are from Tattered Angels. I made sure to let the ink dry before I added the glitter. I stamped the Thank You from Papertrey Ink on the background, added brads and then assembled the card.
That is all for today. Have a great week!


Monday, March 22, 2010

Thank you - 03.22.10

Hello All -

Things are getting a bit hectic over here as we get ready for the baby. My OB said last week that she could come at anytime now, hopefully she'll wait until after our baby shower. I just packed my hospital bag today and put the car set in my car so I guess we are getting pretty close to ready. With all of that, I did manage to sneak in a card today. :-)


This card is for my dad who helped me move one of my horses to a new barn and came with me to check-out a horse trailer. Being almost nine months pregnant makes some of this stuff a little challenging.


I began with a 4"x 5 1/4" piece of white cardstock. I had cut out my own mask using acetate and my Silhouette machine. The shape is one that you can purchase from the online store. It took several passes to get the acetate cut but I am pretty happy with the results. I laid the mask on my cardstock and sprayed the paper with my Tim Holtz mini-Mister filled with Vintage Photo reinker and Perfect Pearls in Gold.


I removed my mask and dried the paper using my heat gun. Once it was dry I reapplied my mask and sprayed my cardstock with Tea Dye reinker in my mini-mister.


Once I dried my paper, I applied Pumice Stone Distress Ink over the flourish.


Then I applied Stormy Sky Distress Ink.


Then I added Chipped Sapphire Distress Ink over the flourish and Black Soot on the edges.


Next, I cut out a label using Spellbinders Labels 1. I stamped the horse image from Creative Impressions with Black Soot Distress Ink. I then applied Antique Linen ink.


I then applied Frayed Burlap and Black Soot on the edges of the shape.


Using the next size up of die I cut out a label in brown cardstock. I then distressed the label using my Tonic Distresser.


Next, I stamped "Thank You" from the Papertrey Ink stamp set Giga Guide Lines using embossing ink and then heat embossed with Gold embossing powder from Zing!


I added a brown ribbon and rick-rack ribbon to the card, the rick-rack is from American Crafts.


I added the horse label using EK Success pop dots. I painted two gold brads using Adirondack paint dabbers in Stream i added these to my labels before I mounted it to my card. Later I added Distress Stickels in Faded Jeans to the brads. I mounted the whole thing to a piece of Charcoal cardstock by The Paper Company.


Have a wonderful week!