The other day I was cutting out some Russian nesting dolls with my Silhouette and had a little extra room on the last piece so I threw in a small piece of fencing. Honestly I didn't even really measure it. I just thought that I might use it on a card, and here is that card.

I started with the fence. I cut it out of white cardstock using my Silhouette.


 And now I started my favorite direct-to-paper inking. Here I started with Bundled Sage Distress Ink, then Forest Moss Distress Ink and on the very edges I added Pine Needle Distress Ink.


 Thank you for visiting and have a great weekend!
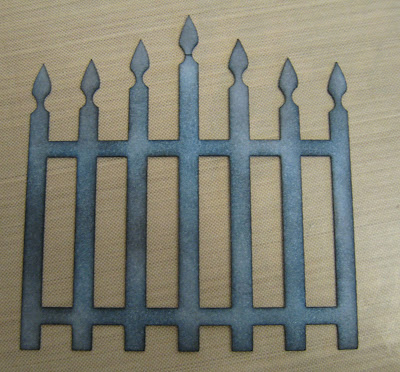
I started with the fence. I cut it out of white cardstock using my Silhouette.
Next, I added Weathered Wood Distress Ink.
Then Black Soot Distress Ink.
To give the gate a more wrote iron look I added Stormy Sky Distress Ink.
Then I started with a quarter sheet of white cardstock.
I then rubbed Crushed Olive, Bundled Sage, and Forest Moss Distress Inks on my Ranger Craft Sheet and spritzed with water. I then took my cardstock and dragged it through the color until I was happy with the result.
All stamps on this card are from Tim Holtz Flights of Fancy clear stamp set by Stampers Anonymous. I stamped the flowers with Forest Moss Distress Ink.
I added the flowers on the left, stamping them with Bundled Sage Distress Ink.
The dream sentiment was added with Forest Moss Distress Ink.
 And now I started my favorite direct-to-paper inking. Here I started with Bundled Sage Distress Ink, then Forest Moss Distress Ink and on the very edges I added Pine Needle Distress Ink.
I mounted the background to a piece of Basic Black cardstock and then to a piece of Forest Foliage cardstock, both are from Stampin' Up!
I added my gate to the background and added a few flowers that I had left over from my previous card. I added a few gems by Hero Arts, because all cards need bling and voila - all done.
I am sorry that my photos are a little blurry, I had the wrong lens on my camera and didn't bother to change it.
 Thank you for visiting and have a great weekend!
1 comment:
It is wonderful to be able to follow you through each step of making this amazing card. Thank you very much!
Post a Comment